How to set up Pi-Hole on AsusWRT Merlin from scratch for home-wide ad-blocking

There’s a world-wide pandemic raging, nation-wide riots over police brutality, lockdown, and curfew. What a perfect time to set up Pi-Hole.
I used NextDNS and loved it, as evidenced by my previous tutorial post.
However, I just moved house recently and found my old Raspi 3 B in some old box. I am definitely guilty of starting some random tech project even though I should probably unpack the millions of boxes in the garage.
This post will list the steps I took to set up the Pi-Hole.
1. Prepare your MicroSD card
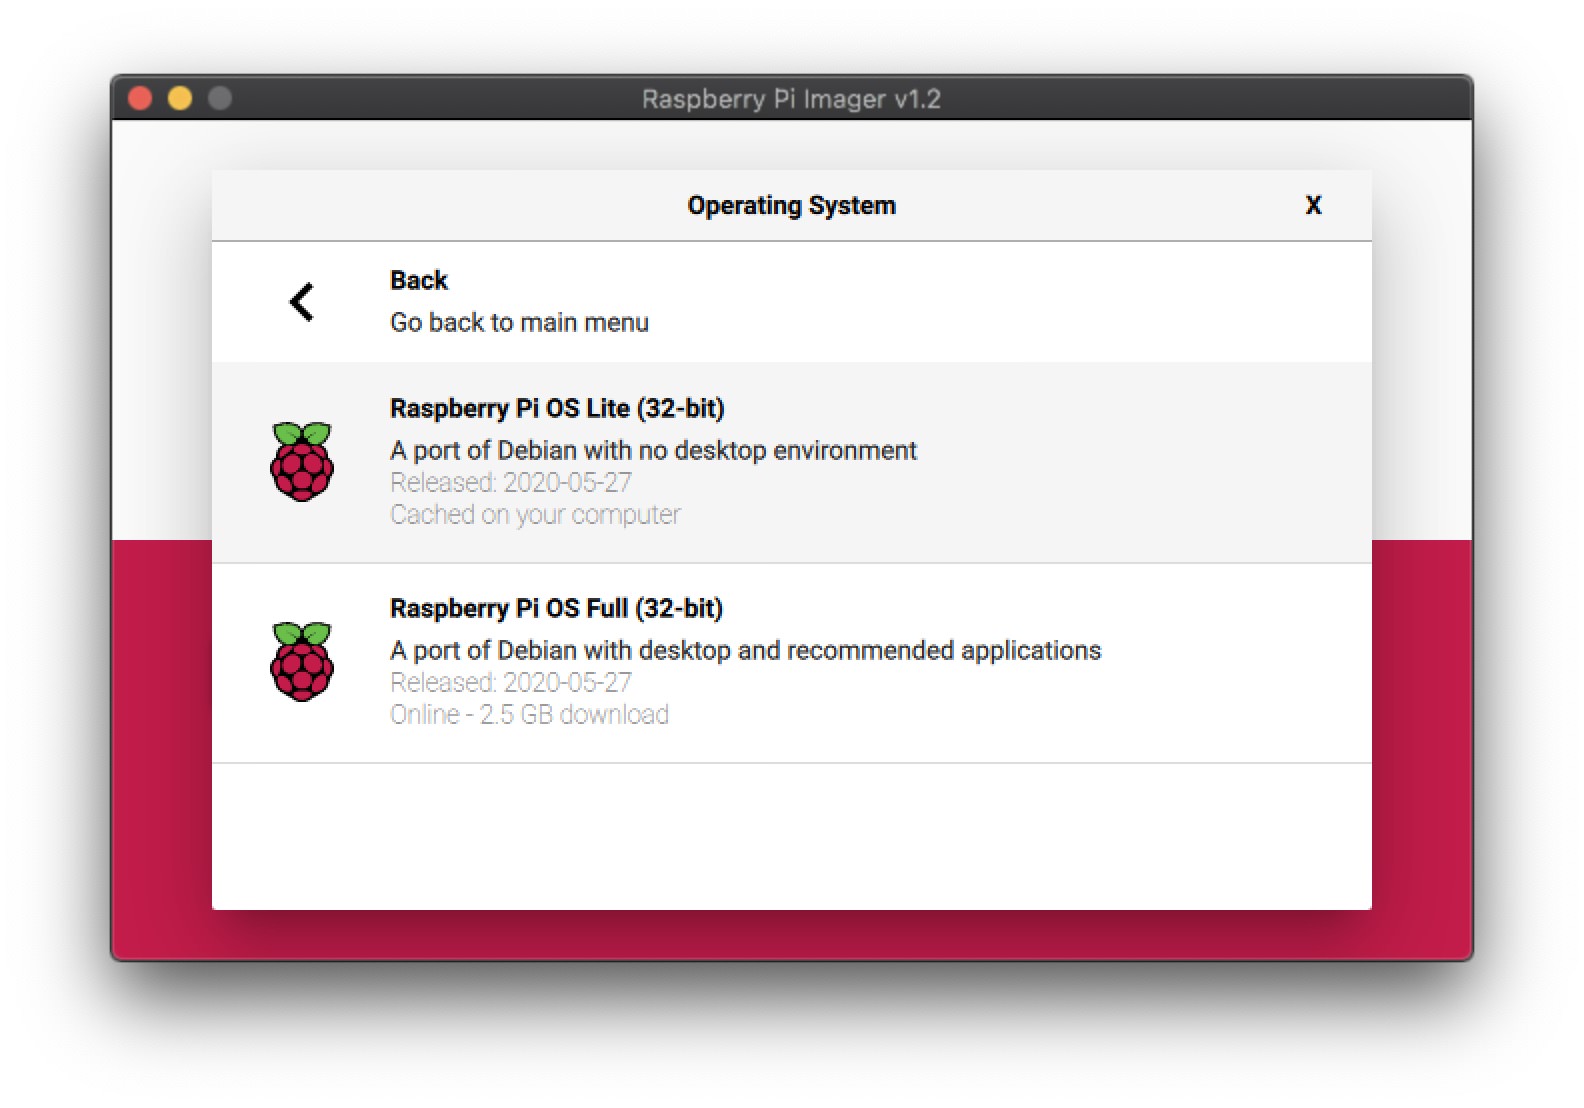
Download the Raspi Imager for your OS.
I chose the Lite version since we won’t be needing any desktop environment. We are running headless! Just plug in your micro SD card and wait for it to finish.
2. Config your Raspi
Once the Raspi is on, you can log in with pi as username and raspberry as a password.
Then run sudo raspi-config to change the default password, set up hostname (i call it pi), enable ssh, and other localization options.
3. Run headless mode
Now that your Pi setup is done, feel free to unplug the keyboard and HDMI cables and let it run headless.
Open up your main machine and run ssh-copy-id pi@pi to enable password-less login next time.
Now ssh pi@pi should work flawlessly.
4. Install Pi-Hole
All you need to do is run this command:
curl -sSLhttps://install.pi-hole.net| bash
More details here.
I enabled the default 4 block list. It seems to work well.
Once it’s all set up, you should be able to login to the dashboard with the supplied password. Of course, we don’t want to use the short password, so head over to terminal and type pihole -a -p to change the password.
5. Configure DNS over HTTPS
You wouldn’t browse the web over HTTP, so why would you let people watch your DNS queries? No, no, no.
The team wrote a charming guide here, so you should follow that.
Just remember to use the ARM architecture.
I used the automated way to start the daemon. What could go wrong?
6. Setup AsusWRT Merlin with Pi-Hole
This is the last step. Congratz.
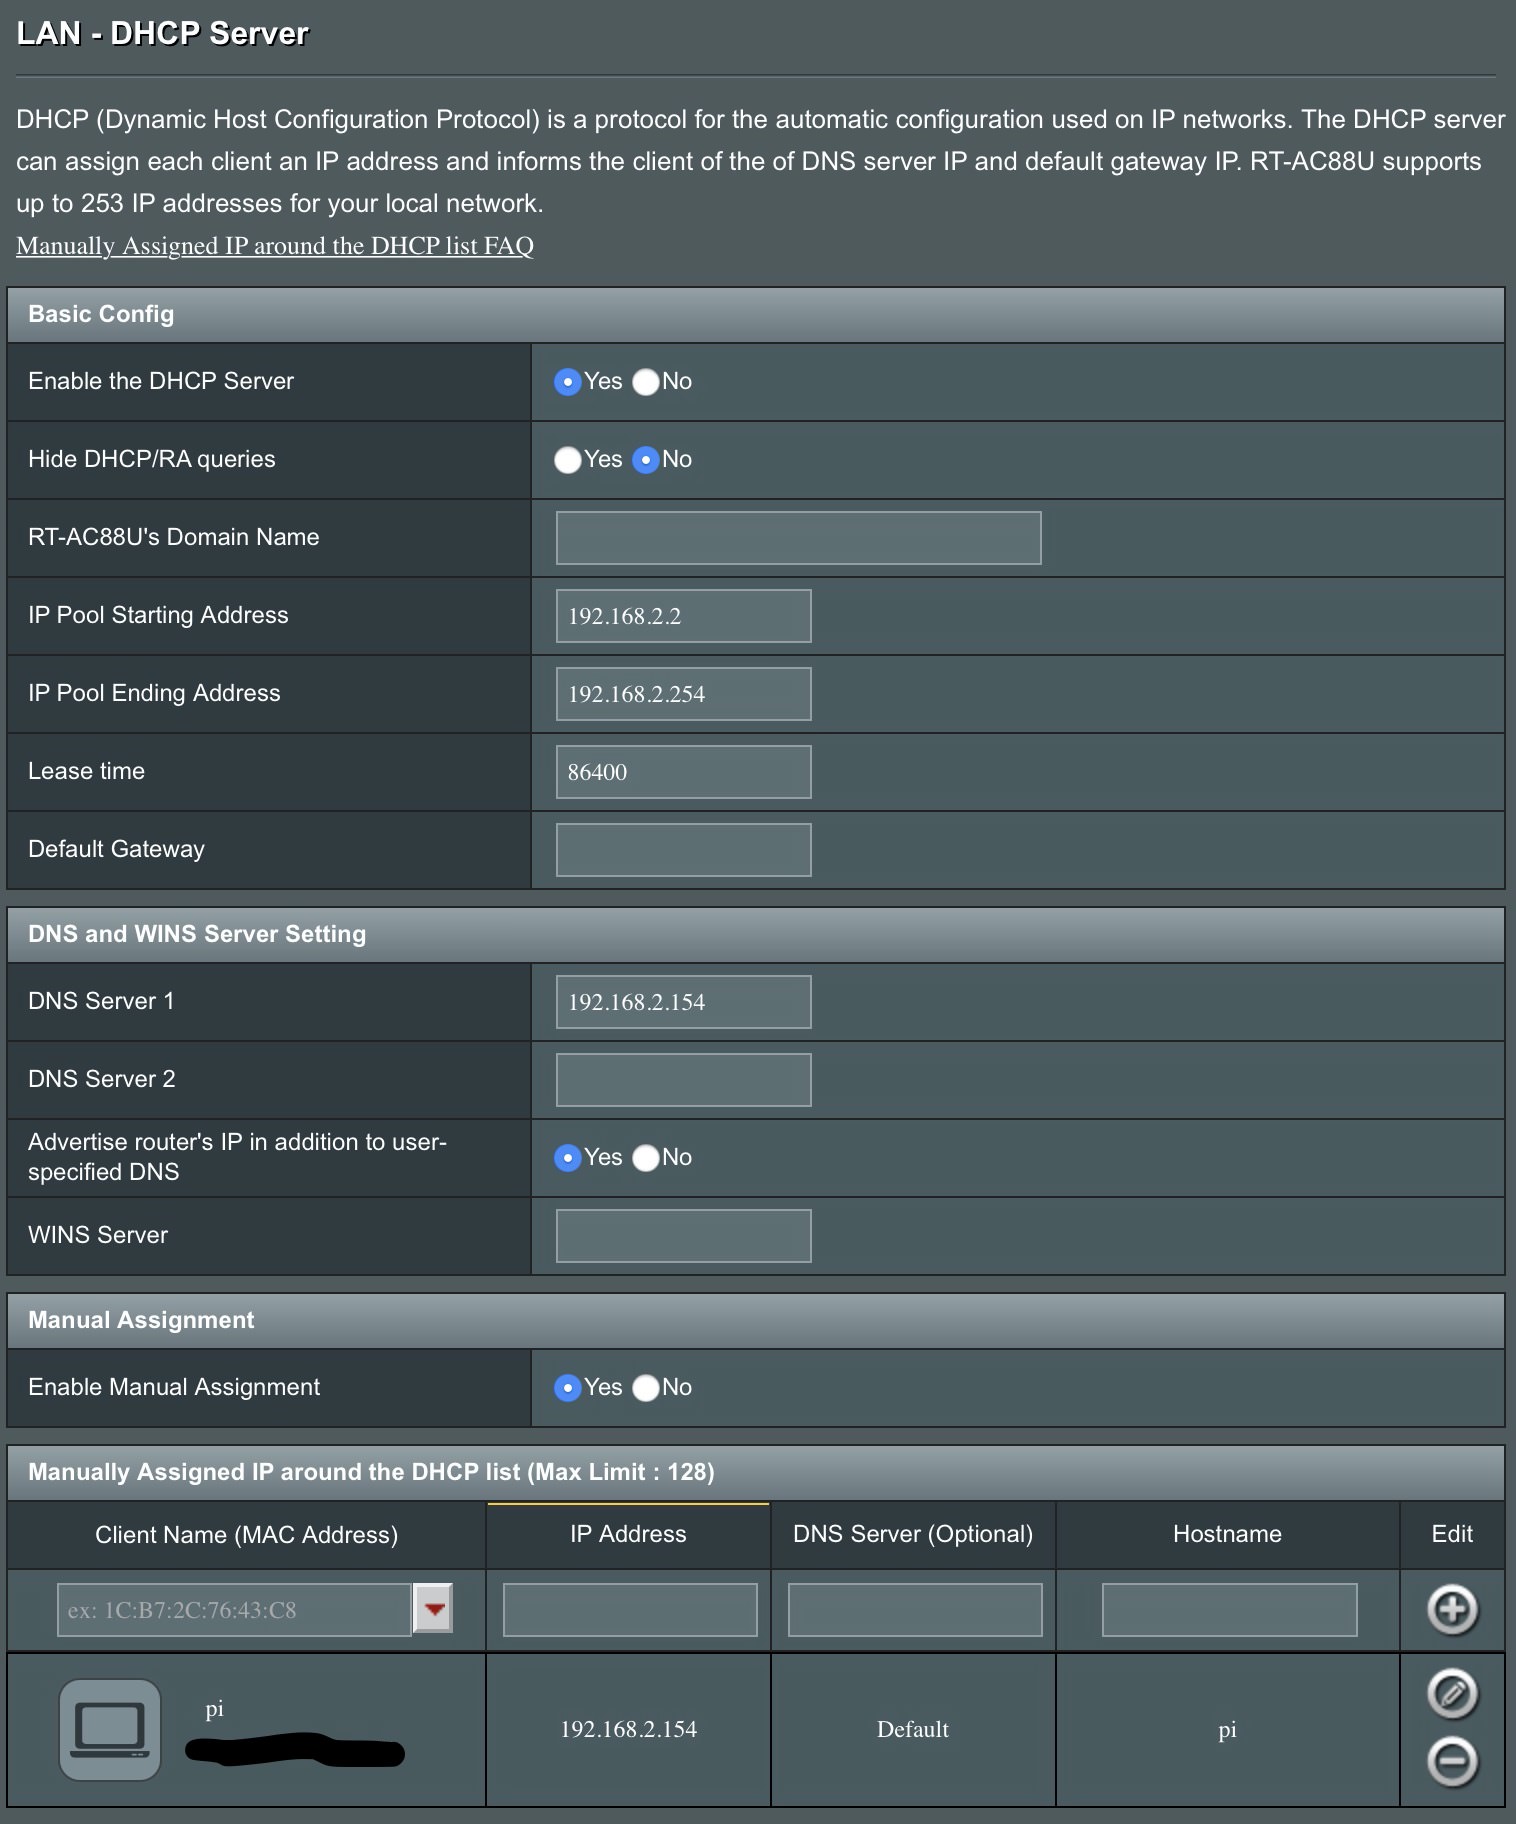
Some kind person has written an excellent step-by-step over on Reddit. Here are the screenshots of my setup for your reference.
LAN -> DHCP Server
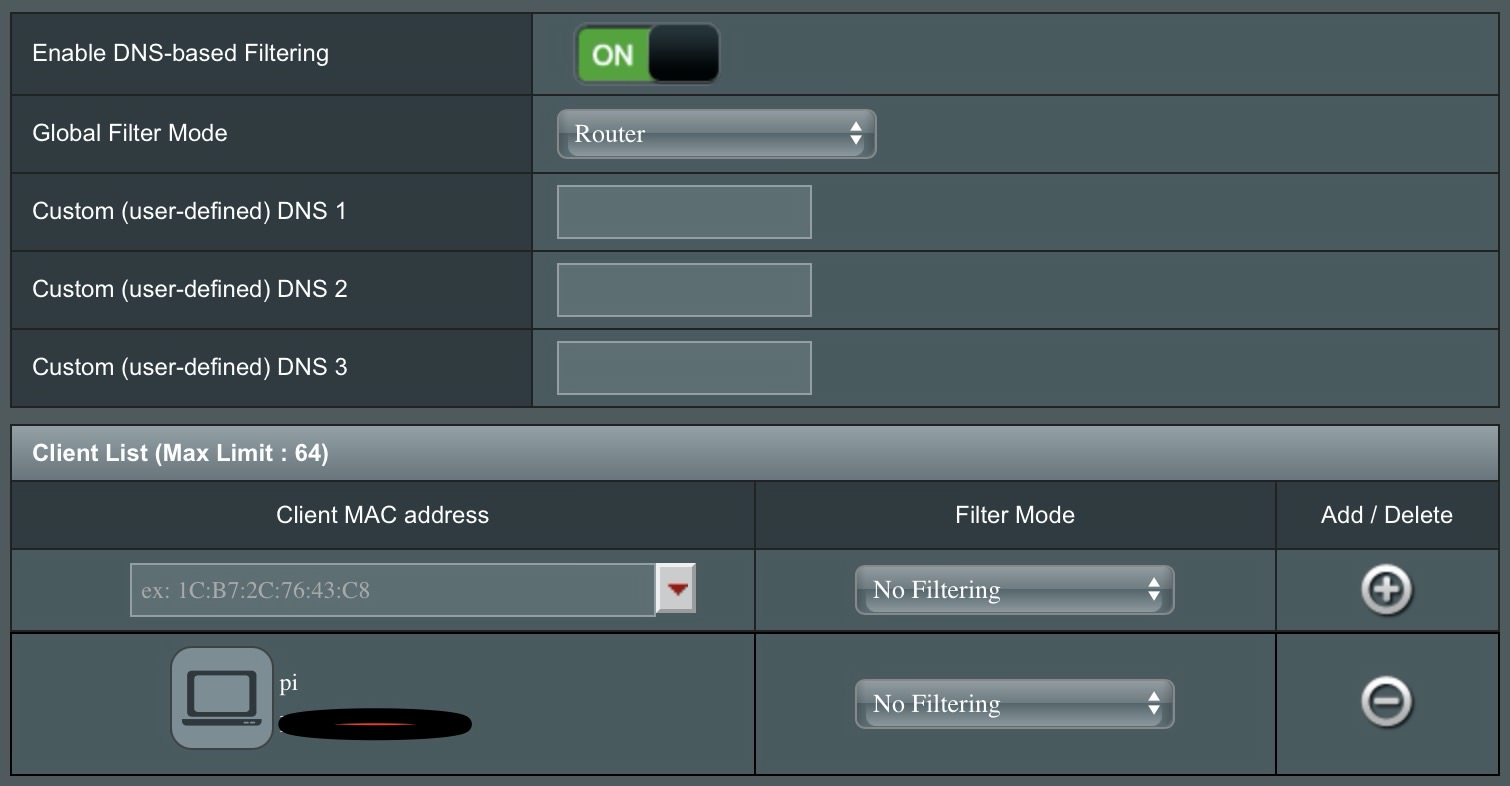
LAN -> DNSFilter
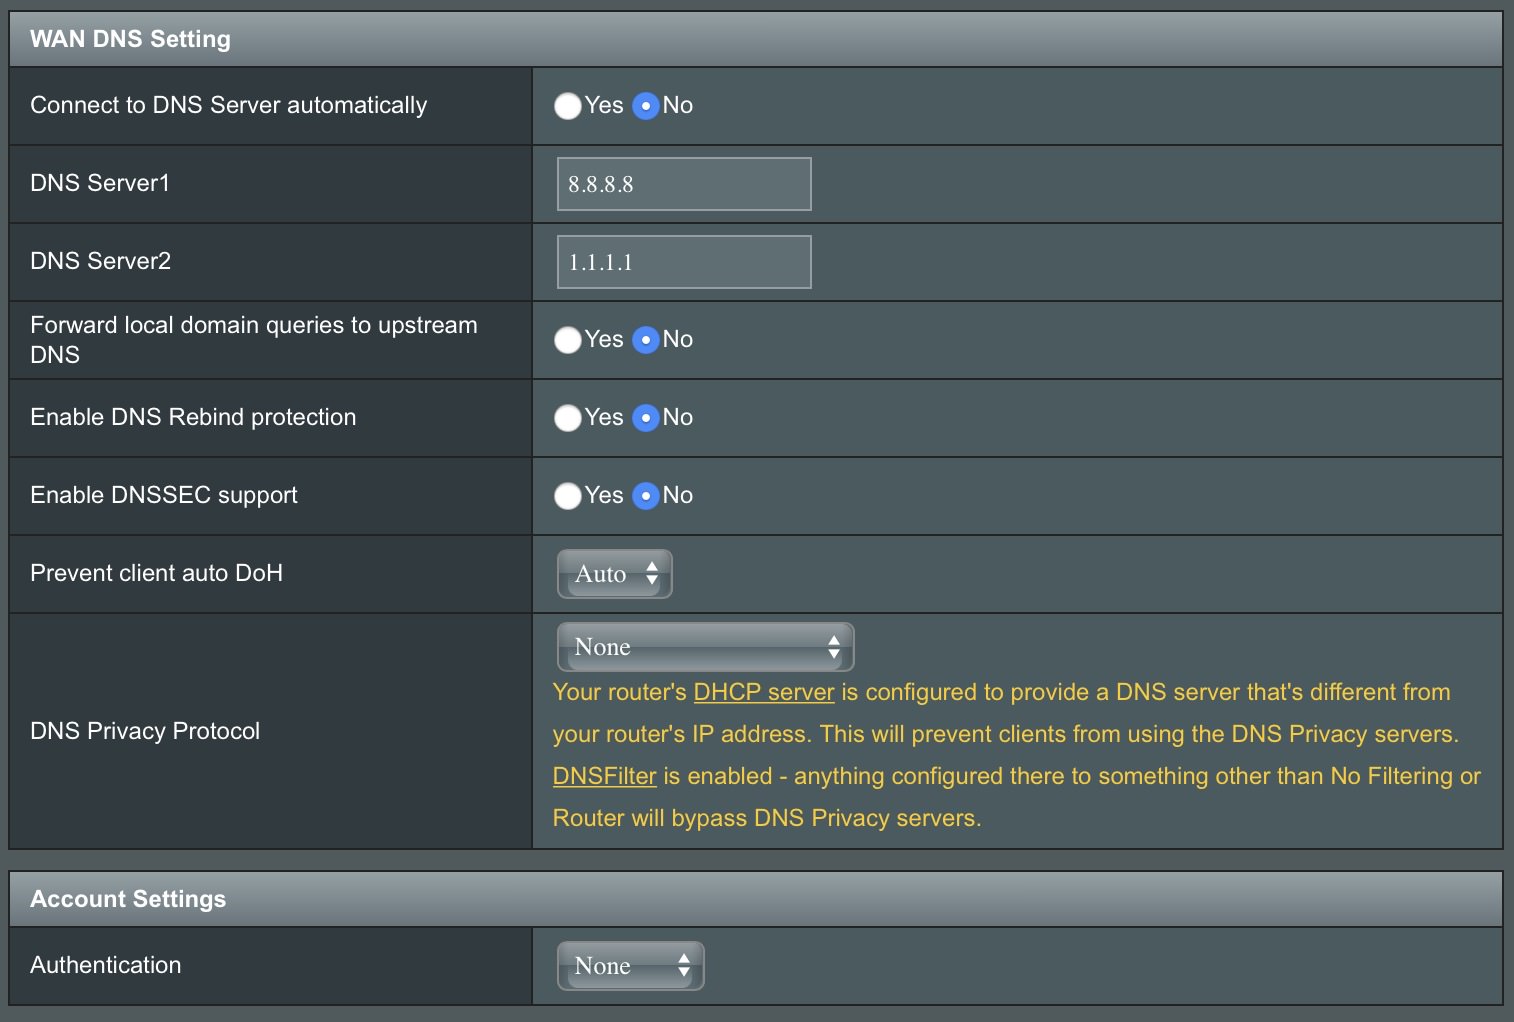
WAN -> Internet Connection
And that’s it. Enjoy your ad-free home internet!
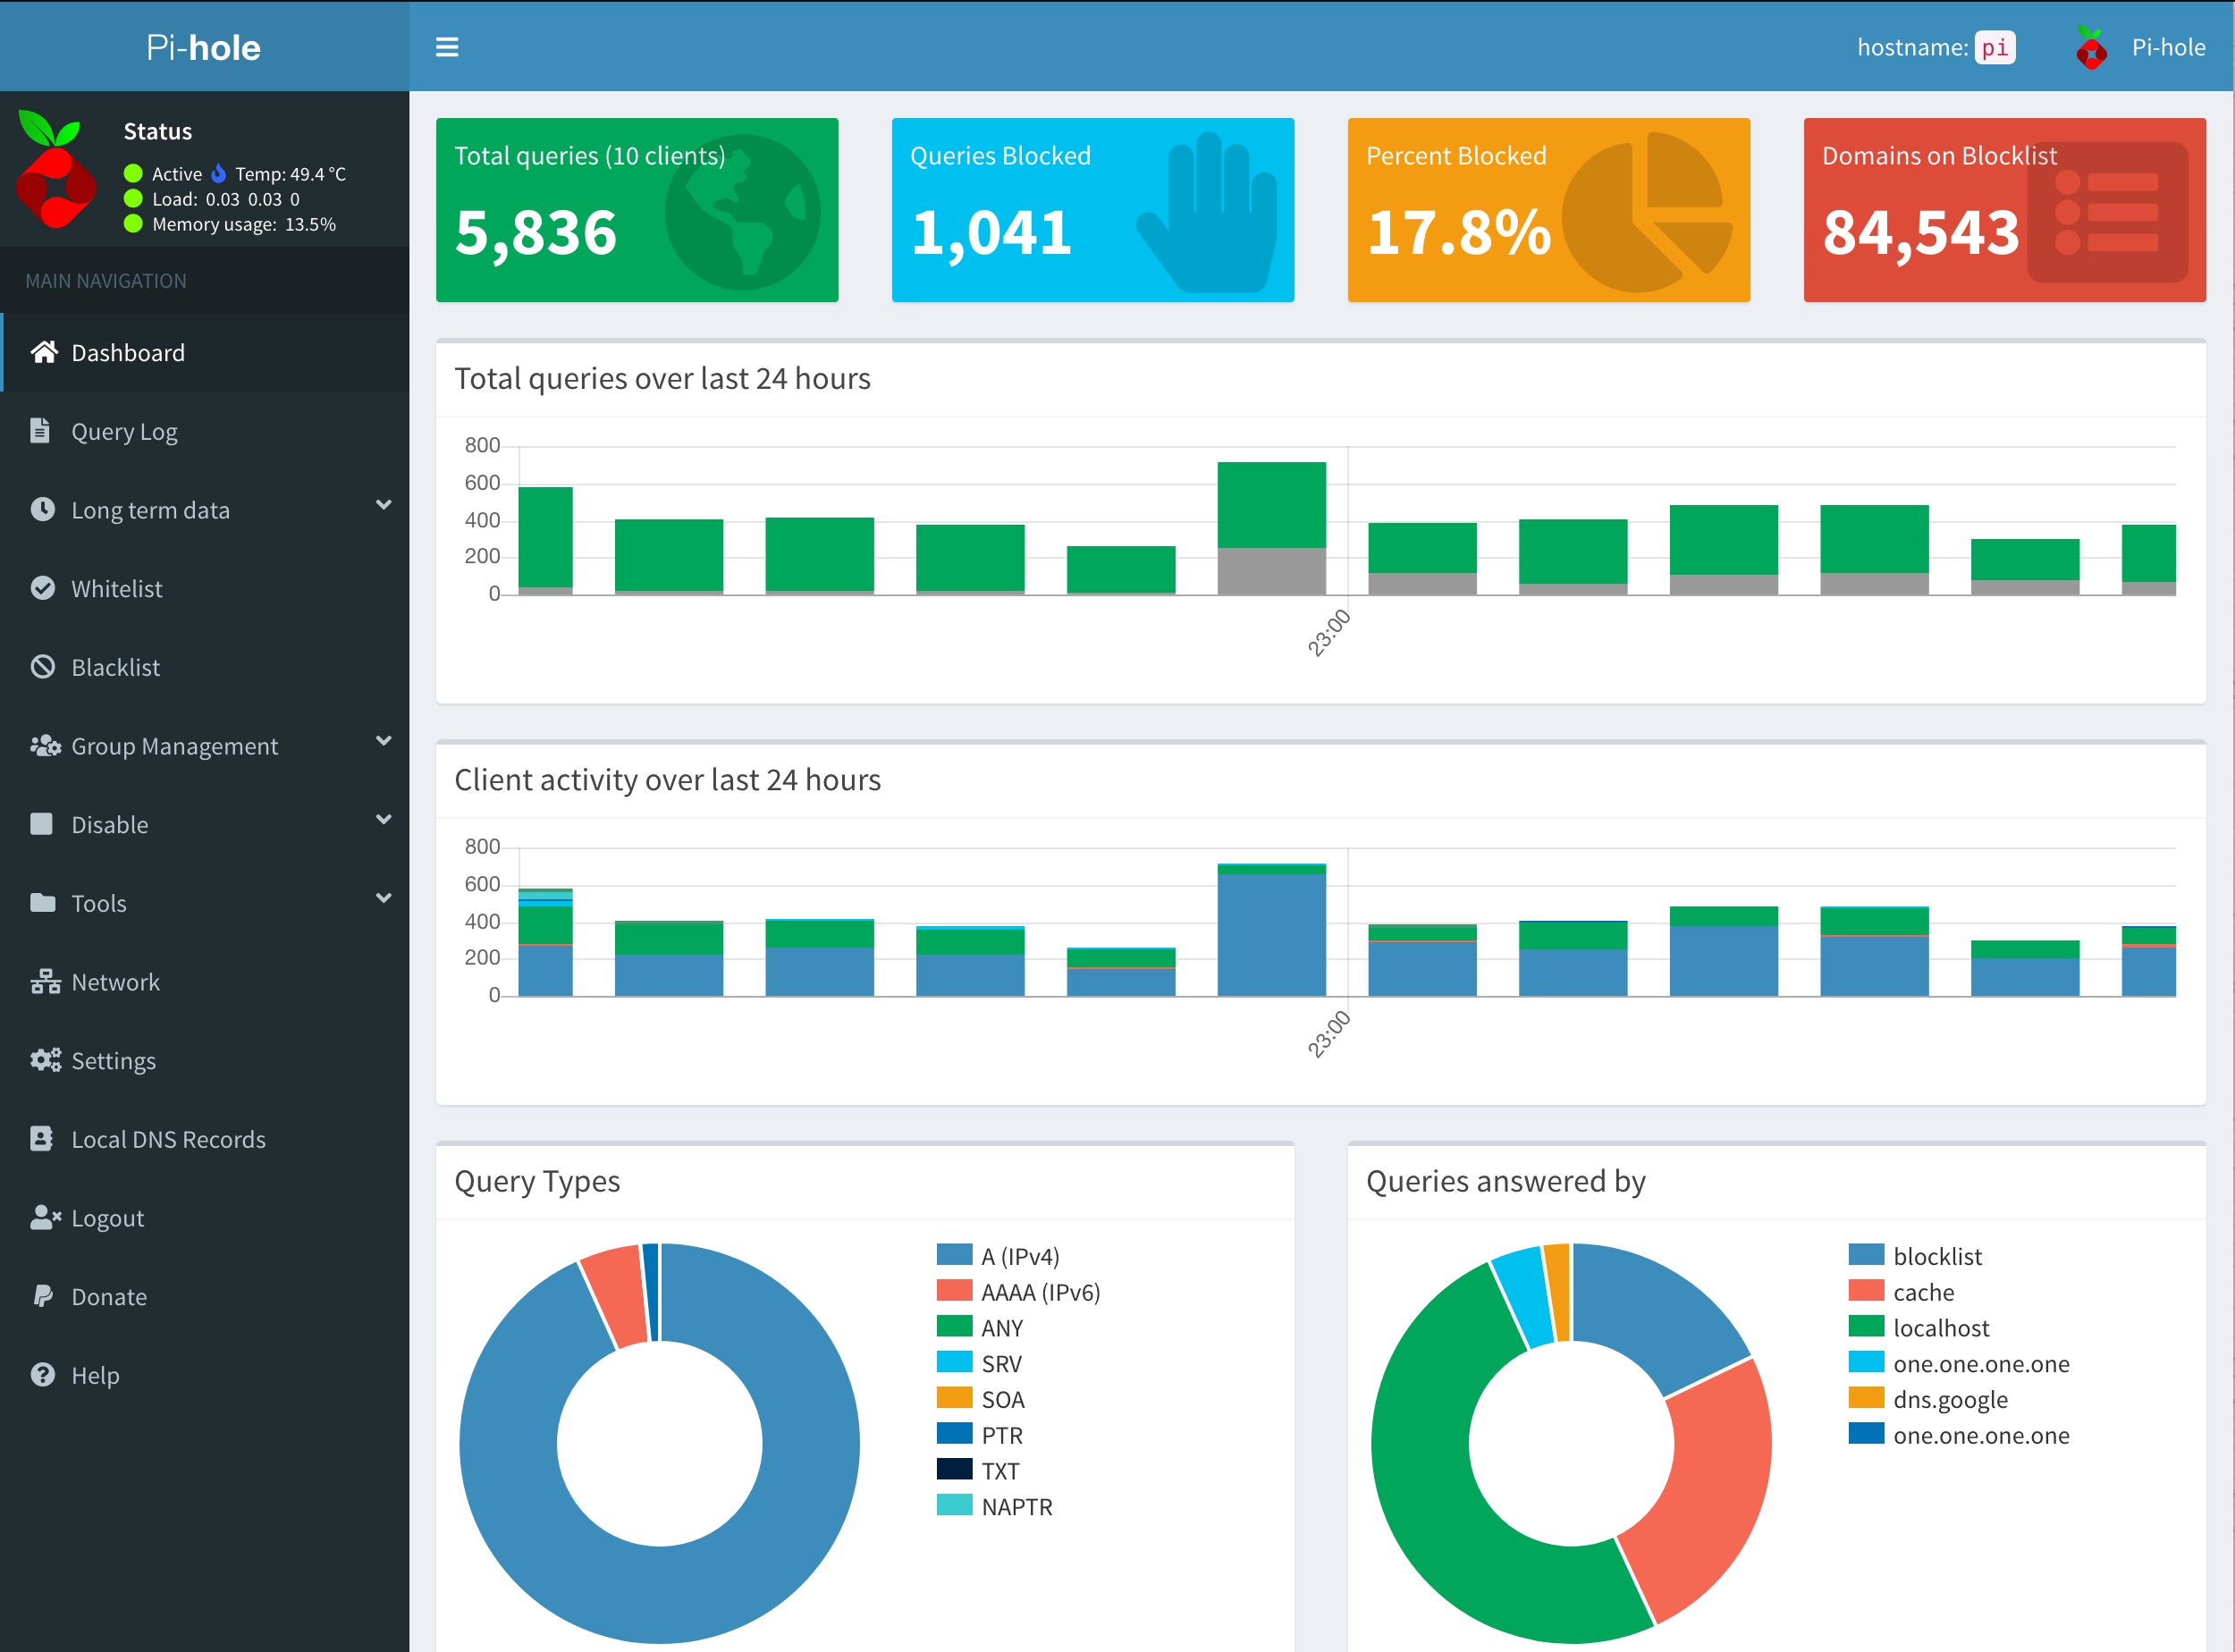
After some time, you should be able to see a bunch of information on the admin panel.