How to use NextDNS with AsusWRT-Merlin [Tutorial]
Update 1/4/2020
Olivier mentioned that this is now directly integrated with Merlin.
More info here: NextDNS Installer
Updated 7/27/2019
Recently I read about NextDNS from this Hackernews post. I used to run Pi-hole to manage DNS-level ad-blocking but its quite a pain to setup. There’s always some issue going on with the Raspberry Pi itself and needed to spend time to manage it.
Now with this service, I can have the DNS blocking like Pi-hole without the hassle!
Setting it up with AsusWRT-Merlin is easy, but NextDNS doesn’t have a setup guide for it. So I decided to write one.
1. Setup new account on NextDNS
Follow this link to get started: Create config
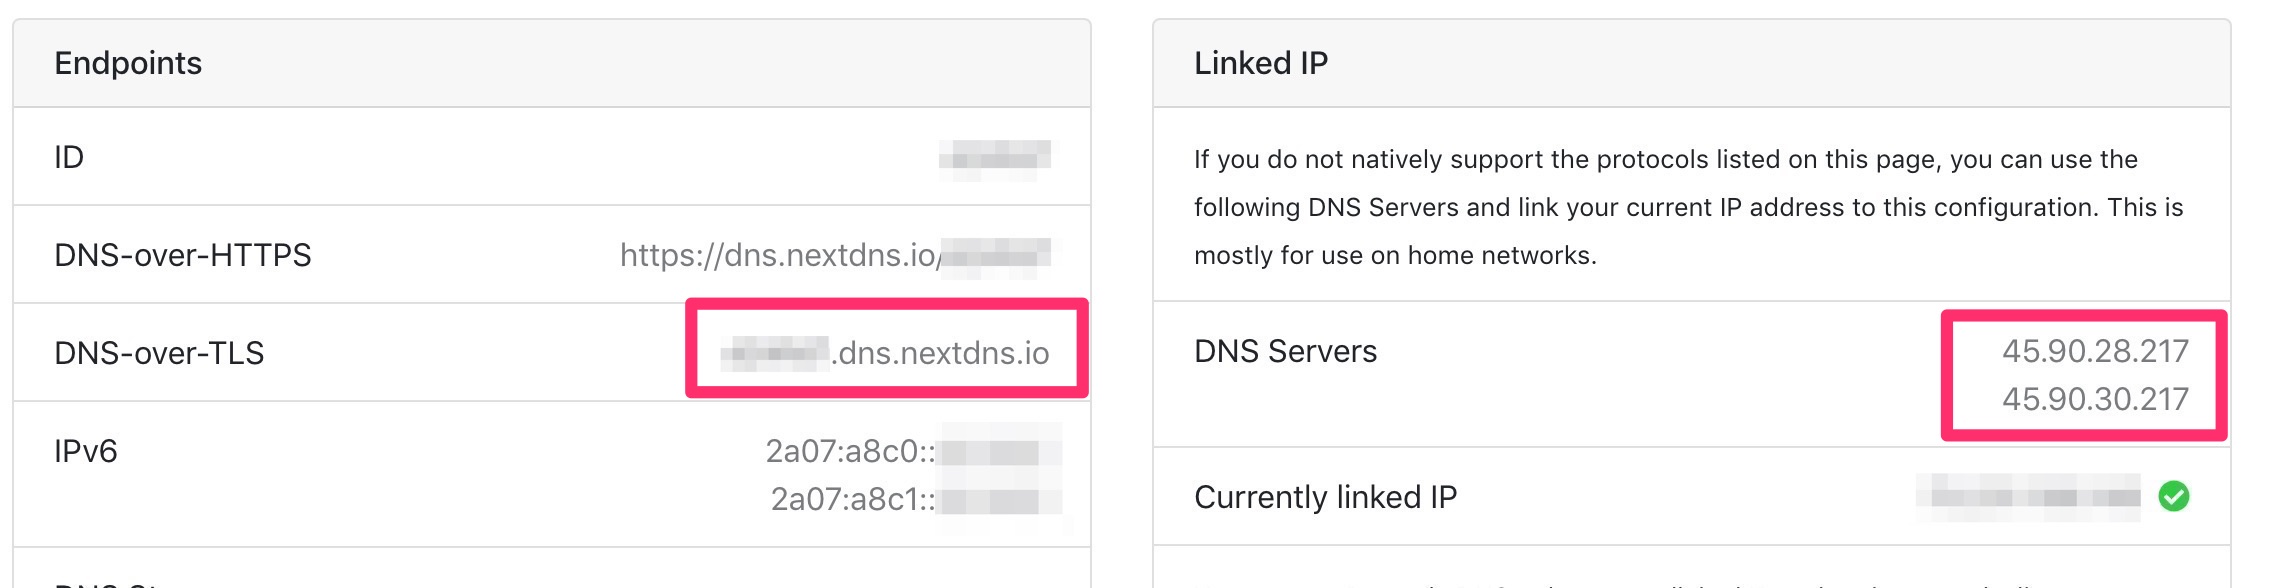
Then go to Setup panel and find the DNS-over-TLS & DNS Servers IP addresses.
It should look like:
2. Open DNS panel
You can get there by clicking WAN button on the left menu.
Previously I used CloudFlare’s DNS, and it worked quite well. But now we want to switch to NextDNS!
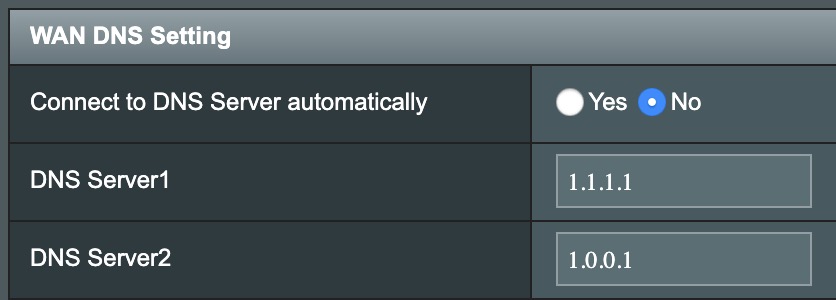
3. Enter the NextDNS details
First, you want to delete the existing DNS Server 1 & 2.
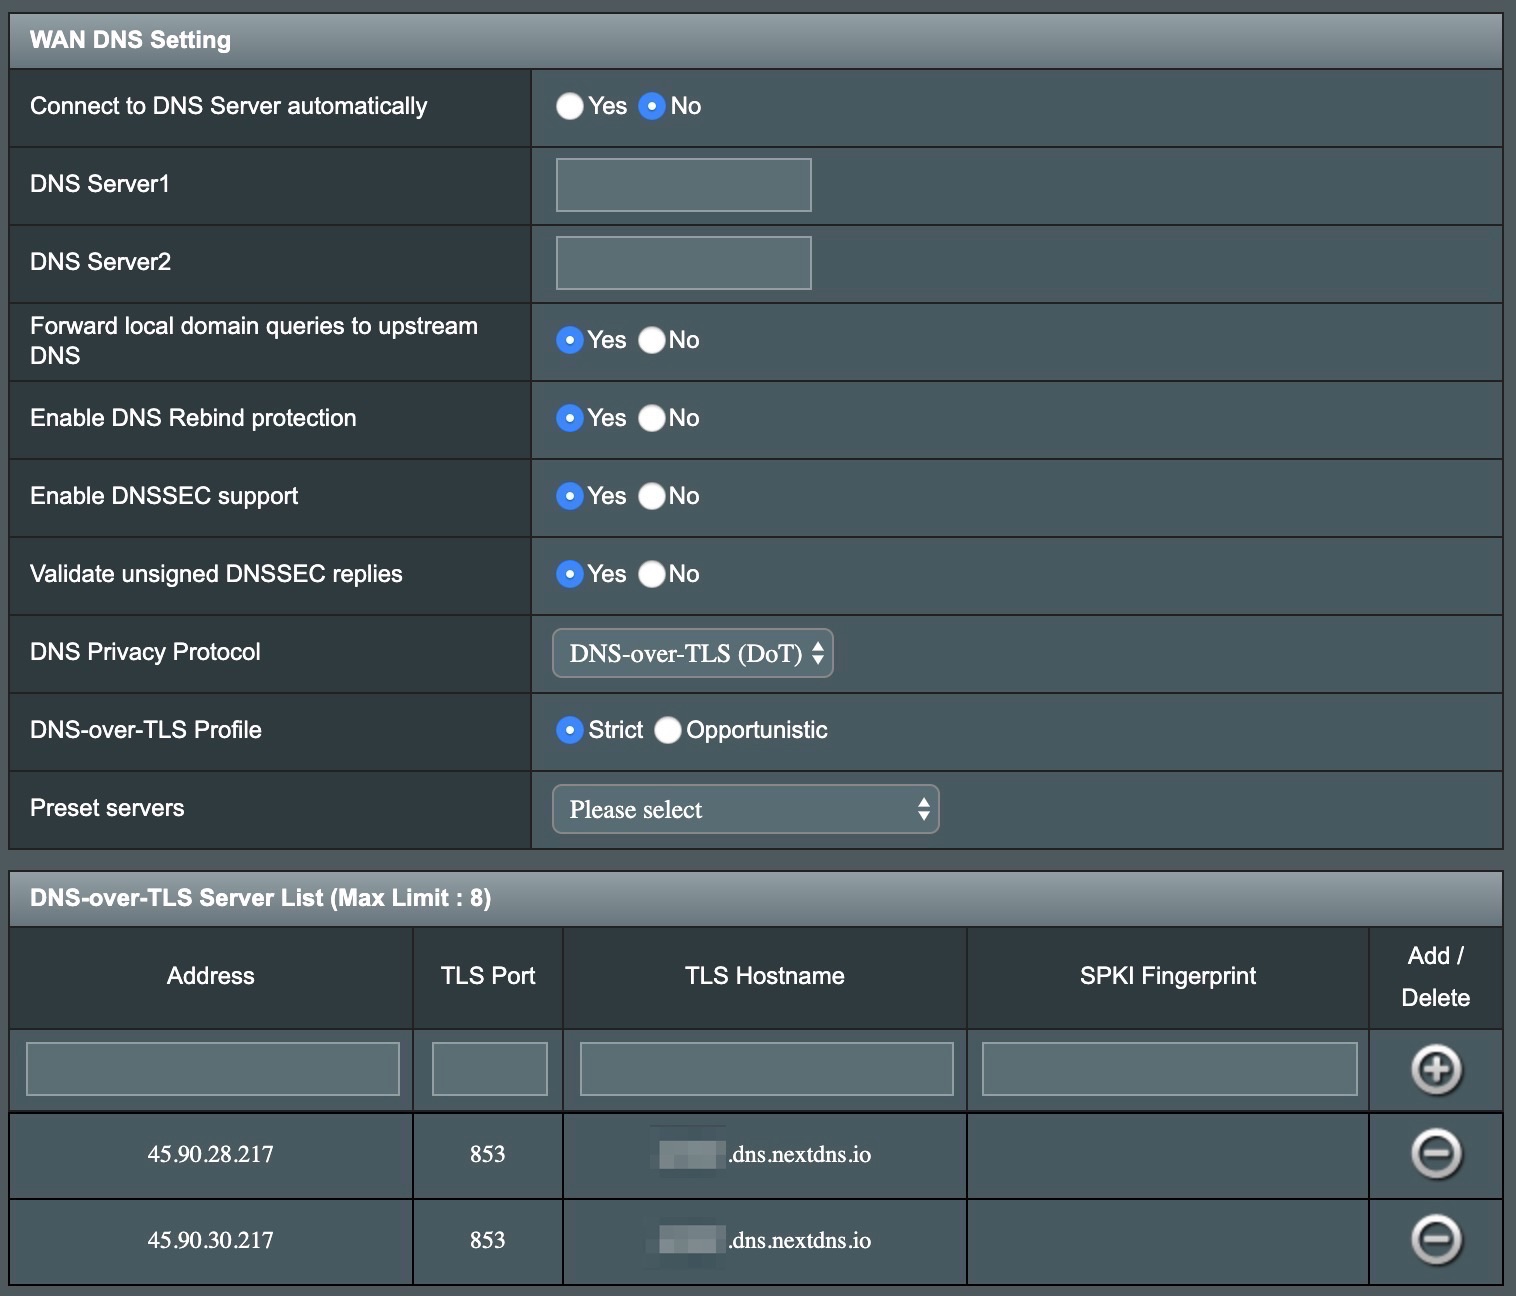
Then, just follow the config example above, then copy paste the DNS Servers to Addresses tab and DNS-over-TLS to TLS Hostname. The port is 853.
After that, you should reboot the router.
4. Done!
Now your whole network should be redirected to NextDNS filtering.
You can start enabling blocker lists like EasyList and StevenBlack from the List panel on NextDNS.
Edit 7⁄27: The below section is now outdated. They routed me to a server that’s very close to my area :)
Not all great… yet.
The service works wonderfully considering that this is so new and still in beta. Right now I’m being redirected to Miami VPS instead of the one in CA even though I’m in CA.
You can check that by going to the ping router page.
The founders are very responsive. I’ve chatted with them, and I’m delighted by their help.


