Motivation
Last time, we have learned how to get started with Hugo and run the server on our local machine. That alone is fun, but our friends couldn’t check it out. What’s the use of a blog if only you can read it? The blog need to be served on the internet through a domain name so people can read it easily.
In this tutorial, we will explore the delighful ways of hosting Hugo blog with CentOS, Nginx and side of Let’s Encrypt.
Contents
The steps that we will go through are:
- Creating account on Vultr
- Spinning up CentOS VPS instance
- Pointing your domain name to the new VPS
- Creating user account and setting up passwordless SSH login
- Installing NginX and setting up site config
- Writing deployment script with Rsync
- Setting up HTTPS with free SSL cert from Let’s Encrypt
The contents will be spread out to several tutorial post to make it easier for you to digest.
VPS
We will be using Vultr to host our VPS. Why Vultr? I came highly recommended from my friend Curtis over at CentOS Blog. He is the devops guy at PwC and we used to work together, so I know to just trust his words on server stuff. Who better to ask from than the guy who play with server all day long?
Plus if you register to Vultr with this link, you will get $20 free credit that you can use to spin up server for free!
Creating account and spinning up VPS on Vultr
So lets over to Vultr and create a new account if you haven’t already. It is pretty straightforward and should be pretty standard account creation process.
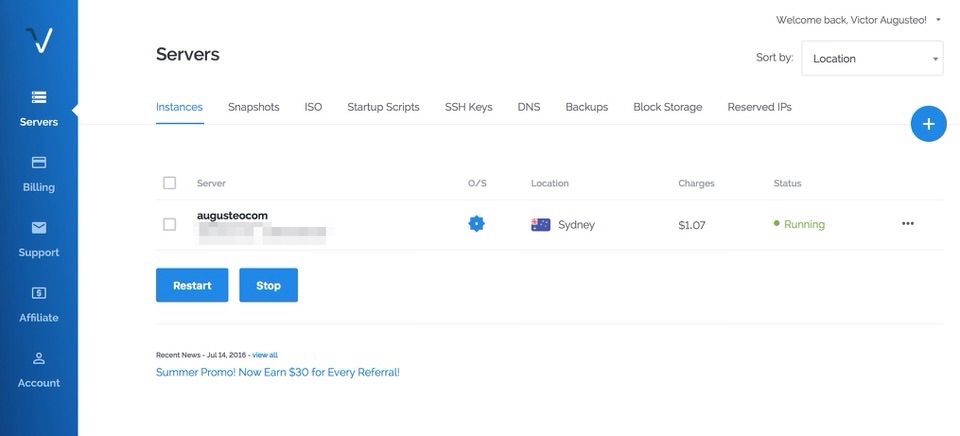
After you are done, please log in. You should see this screen:

Let’s click the big blue plus button to spin up a new VPS instance. It should say Deploy New Server when you hover over it. Next screen will ask you series of questions regarding your new server:
On the top, select Compute instance
- Location: Select the one close to you or your readers for better latency
- Server Type: Select CentOS 7 x64
- Server Size: Select the $5 option as it should be enough for our needs now. If you start getting millions of users, then we can easily scale up.
- Additional Feature: You can check the IPv6 and leave the rest unchecked, they are all optional.
- Startup Script: Leave it empty
- SSH Keys: Add your RSA public key here or just leave it empty if you don’t know what it means
- Server Hostname & Label: Enter your domain name on the first field or just leave it blank if you don’t have it now
All done, now let’s just press the Deploy Now button on the bottom.
You should be taken back to the dashboard with your list of server. The new server’s status will be shown as Installing for a couple minute. Just wait for it until it says Running.
That’s great! Now we have a server running with its very own IP address. It’s yours. Unique. The only one in the world.
But we don’t have anything on the server yet, so if you tried to open the IP address on browser or curl, you won’t get anything back
➜  ~ curl 45.32.190.53
curl: (7) Failed to connect to 45.32.190.53 port 80: Connection refused
Don’t worry, once we set up NginX on the server, everything will be fine.
Registering domain and pointing it to our server
I have just registered augusteo.xyz for this tutorial because it is the cheapest TLD I could find: only AUD 0.50. This tutorial will not cover the process of domain registration and I will assume you have your own domain name to use.
Let’s login to your domain registrar management page. The example shown is specific to CrazyDomain as it is where I register my .xyz domain name, but it will be easily applicable to any other registrar.
Find the option to change/edit your domain’s nameserver:

Change the first and second entry to:
ns1.vultr.com
ns2.vultr.com
And hit save.
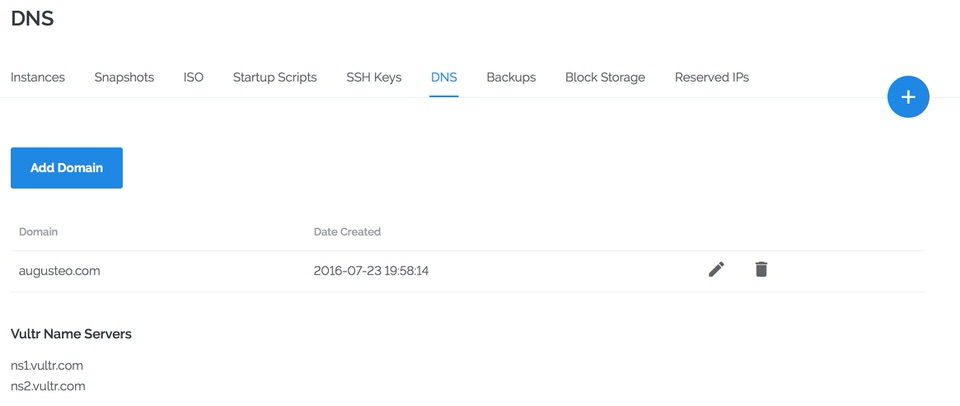
Now lets get back to Vultr management page and select DNS on the top menu bar.

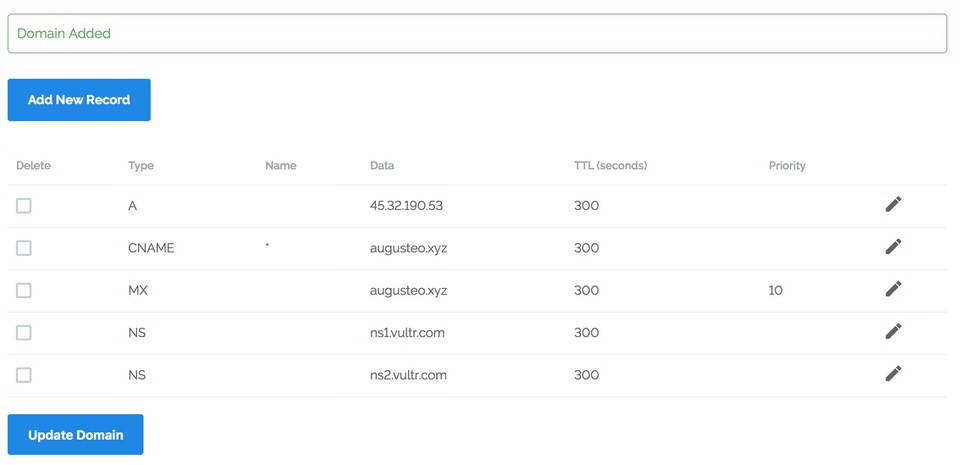
Let’s press the Add Domain button. In the Domain field, just enter your domain name. In my case I would enter augusteo.xyz. In the IP field, enter the IP address of your Vultr VPS instance. You can get it from the Instances list.

When you are happy, just press Add. You should see the finished DNS entry page:

We are all done with domain! Now if you access augusteo.xyz it should point to your new Vultr VPS server. The DNS propagation could take up to 24 until servers around the world knows where to point it to. You can check the propagation using What’s my DNS web app. While it is propagating, we can move on to setting up our server.
Summary
In this tutorial, we have learned how to spin up a new CentOS VPS and setting up DNS to point domain name to that VPS.
The next tutorial will go through:
- Secure your CentOS server
- Create your new user account
- Adding RSA key for passwordless login
- Installing NginX and setting up configs
- Installing Let’s Encrypt Free SSL certs
Stay tuned!


